TIP: How to sync your entire Sublime Text project over to your dev server with a single keystroke
If you do all of your web coding on your laptop, but don’t run a local PHP stack, you may be searching for a quick way to sync your files over to your dev server. Well, my friends, look no further than rsync. Not only is it fast and secure, but you can actually set it up to be a build tool in Sublime Text 2. Here’s how to set that up:
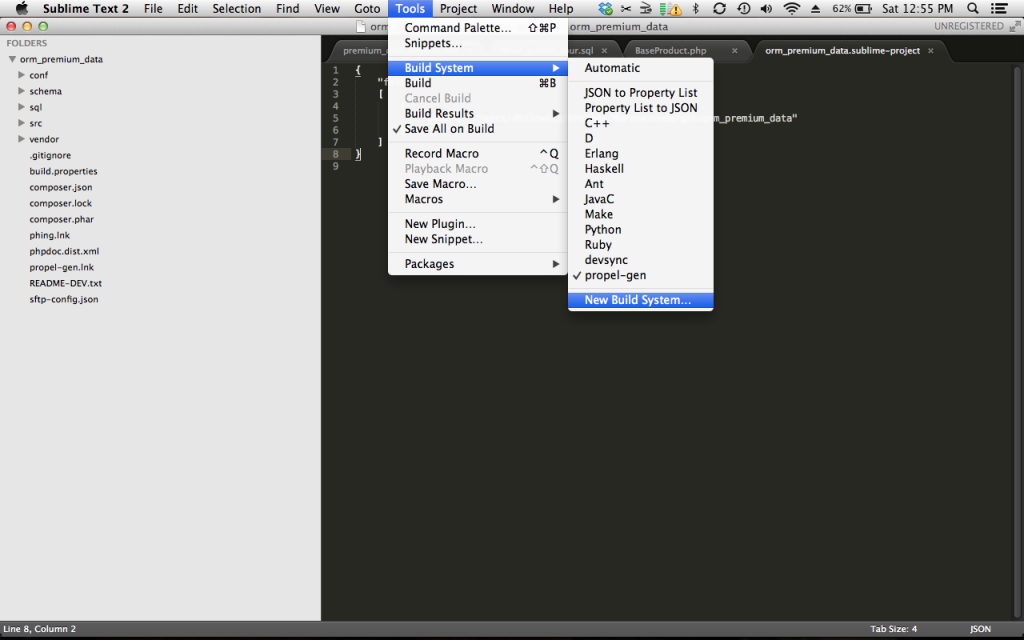
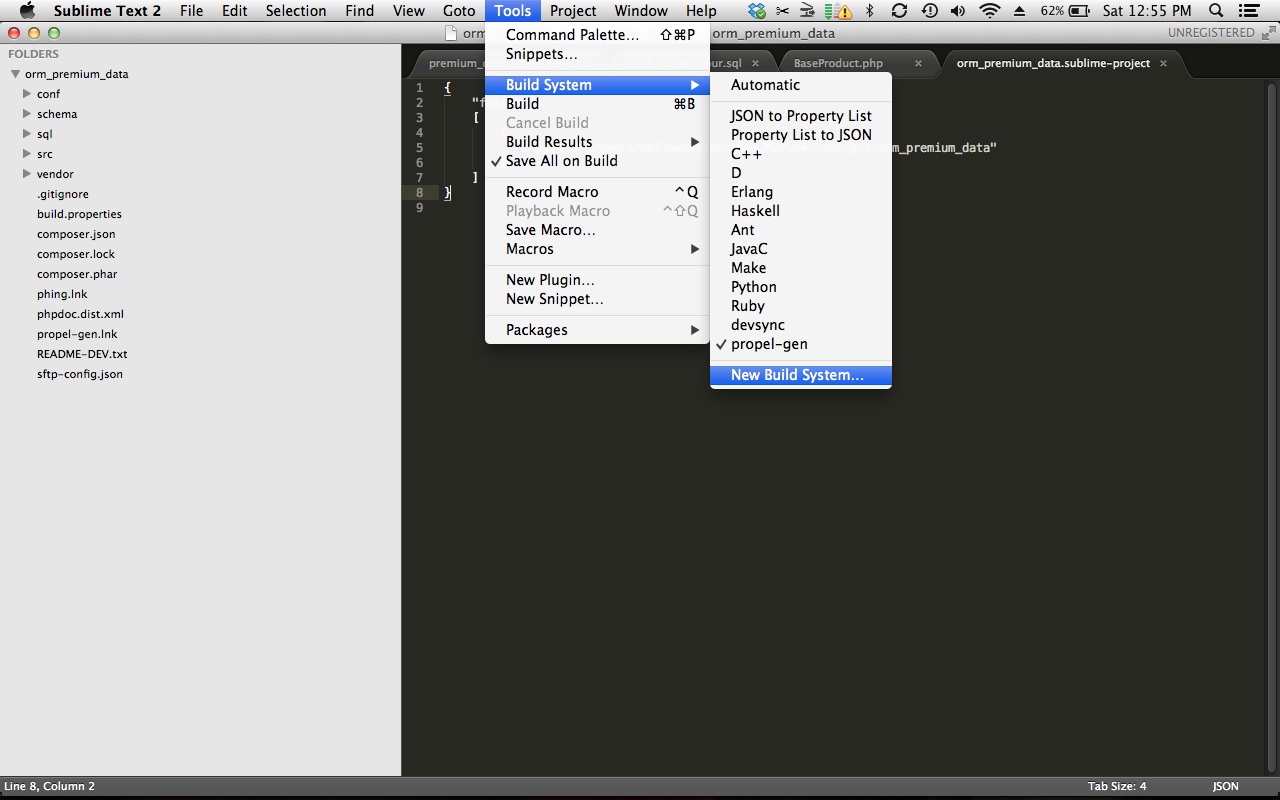
1. Select the Tools → Build System → New Build System… menu option.
2. A new window will pop up with the a blank template for your new build system. Here’s what mine looks like:
{ "cmd": ["./devsync", "${project_base_name}"], "working_dir": "/Users/dhilowitz/code/" }
As you can see, I don’t run rsync directly, but rather point Sublime Text to a shell script called devsync that lives in my ~/code directory. I have this file saved as devsync.sublime-build.
3. Finally, here’s what that ~/code/devsync script looks like:
#!/bin/bash if test -z "$1" then echo "Missing folder name argument." else RSYNC_TO="[email protected]:/mnt/www/$1/" echo "Syncing from `pwd`/$1 to $RSYNC_TO" rsync -avz --delete --exclude '.git' -e ssh ./$1/ $RSYNC_TO fi
That’s it! Of course, your development setup is probably not identical to mine, so you will have to play around in order to get things working properly. rsync can be a finicky thing to get working if you don’t have experience with it. You may want to do some trial and error on the command line before moving your commands into the shell script. It should be noted that it is possible to actually invoke rsync directly from Sublime Text (i.e. without a shell script). It’s also possible to set it up on a per-project basis so that you use different settings depending on which project you are working with. Here’s an example of a project file that invokes rsync directly:
{ "folders": [ { "path": "." } ], "build_systems": [ { "name": "rsync", "cmd": [ "rsync", "-avz", "--delete", "--exclude", "'.git'", "-e", "ssh", "./site/", "[email protected]:/var/www/" ] } ] }
Good luck!
–Dave
PHP TIP: A quick, non-RegEx way of replacing an IMG tag’s SRC= attribute
It’s often useful to be able to swap out the src= attribute of an HTML IMG tag without losing any of the other attributes. Here’s a quick, non-regex way of doing this. It uses the PHP DOM API to create a tiny HTML document, then saves the XML for just the IMG element.
function replace_img_src($original_img_tag, $new_src_url) { $doc = new DOMDocument(); $doc->loadHTML($original_img_tag); $tags = $doc->getElementsByTagName('img'); if(count($tags) > 0) { $tag = $tags->item(0); $tag->setAttribute('src', $new_src_url); return $doc->saveXML($tag); } return false; }
Note: In versions of PHP after 5.3.6, $doc->saveXML($tag)
 can be changed to $doc->saveHTML($tag)
.
TIP: How to Play a Sound Whenever You Commit to Git
Writing code alone at home can be an isolating experience. There you are, day in day out, quietly making magic with your mind (sarcasm, obv.) only to silently commit the fruits of your labor into the void of your source control repository, appreciated by no one. If only a crowd of children could be retained for the sole purpose of cheering you on every time you complete something.
Amazingly, Brandon Keepers over at Collective Idea had the same exact same thought (almost; he was substantially less melodramatic in his blog post about it). Â Anyway, here is what my version of his script looks like:
#!/bin/sh toplevel_path=`git rev-parse --show-toplevel` afplay -v 0.1 $toplevel_path/.git/hooks/happykids.wav > /dev/null 2>&1 &
I put this in a file called .git/hooks/post-commit.playsound
. I then trigger this from the main .git/hooks/post-commit
script as follows:
#!/bin/sh toplevel_path=`git rev-parse --show-toplevel` $toplevel_path/.git/hooks/post-commit.tweet $toplevel_path/.git/hooks/post-commit.playsound
Where the post-commit.tweet
script is the script from this blog post. If you aren’t also tweeting your commit posts, you’ll want to delete that line.
If you want this to work for every single Git repository from now on, add these scripts to your git-core templates. You’ll have to figure out where these are (it’s different for every setup). For my Mac, they’re located here: /opt/local/share/git-core/templates/hooks/post-commit.
–David
TIP: Turn WordPress Page Titles On or Off Using Custom Fields
Most WordPress themes display page titles for every page. This is usually what one wants, but sometimes it’s useful to be able to easily turn off WordPress page titles for individual pages but still keep them on by default. This is easy to do with custom fields. For simplicity’s sake, I am going to base these examples on the default WordPress Twenty Twelve theme although the same principle should apply to almost any theme.
The first step is to find where the page title is being generated. In the Twenty Twelve theme, this is in the content-page.php file. Go into content-page.php and find the block of code that looks like this:
<header class="entry-header"> <h1 class="entry-title"><?php the_title(); ?></h1> </header>
and change it to this:
<?php if (get_post_meta($post->ID, 'show_title', true) != "no") {?> <header> <h1><?php the_title(); ?></h1> </header> <?}?>
As you can see we’ve wrapped the <header> tag in an “if” statement. This checks for the presence of a “show_title” custom field for this particular page. If one is present and its value also equals “no,” we don’t show the title. Otherwise, the page title is shown.
The only step left is to open up the editor for the page you want to modify. Go to the bottom of the page to the “Custom Fields” section. (If there is no “Custom Fields” section, you may have to go up to the top, click “Screen Options” and check the “Custom Fields” box.) In the “Name” box, type “show_title.” In the “Value” box, type “no.” Hit “Update.”
That’s it! Your page title should be gone from that page.
–Dave Hilowitz
How to Relay your Git Commit Messages to Twitter in 16 Easy Steps
A while back I started using Twitter as a micro-journaling platform. I created a private Twitter account, and every few hours as I worked on code, I would jot down a private tweet to myself about what it was that I was doing. This private Twitter stream was then archived using Momento App for iPhone. After a while, it occurred to me that another stream that I would love to have archived in Momento is my Git commits as it often says more about what I’m up to than it would occur to me to write in a journal.
I set up a Git post-commit hook that posts to my private Twitter account each time I make a local commit on my development repository. Here’s what I did:
- Prerequisite: Create a Twitter account. It doesn’t have to be private, but it can be.
- Register an application with Twitter. Here’s how you do that:
- Go to http://dev.twitter.com. You may need to sign in again.
- Hover over your avatar in the top-right, and choose “My Applications” from the menu that appears.
- Click on the “Create New Application” Button.
- Fill out the next however you’d like. The website address can be anything. The name of the app can be anything. Leave Callback URL blank. Agree to the agreement, enter the CAPTCHA and you’re good to go.
- Next, you’ll be taken to a screen with a bunch of keys. Copy all of those down into a text editor.
- Click the “Settings” tab. Change to “Read and Write” for Application Type. Click Update.
- Go back to the Details tab. Scroll down to the bottom and click “Create my OAuth Access Token.”
- Wait a few seconds, refresh the page, wait some more. Eventually, at the bottom of the page a section should appear that says “Your access token.” Copy these codes down.
- That’s it for your Twitter App setup.
- Go to http://dev.twitter.com. You may need to sign in again.
- Open up a shell on the machine you are planning to be commit to (and tweet from).
- Install http_post. You will have to compile this from source. (make and make install). Make sure it’s accessible from your PATH.
- Install oauth_sign. You will also have to compile this form source. (make and make install)Â Make sure it’s accessible from your PATH.
- Finally, save the following script into .git/hooks/post-commit in your Git repository.
#!/bin/sh # PATH modification needed for http_post and oauth_sign export PATH=$PATH:/usr/local/bin toplevel_path=`git rev-parse --show-toplevel` toplevel_dir=`basename "$toplevel_path"` branch=`git rev-parse --abbrev-ref HEAD` subject=`git log --pretty=format:%s -n1` hashtags="#code #$toplevel_dir" tweet=$hashtags' ['$branch']: "'$subject'"' # truncate tweets that are longer than 140 characters if [ ${#tweet} -gt 140 ] then tweet_trunc=$(echo $tweet | cut -c1-137) tweet=${tweet_trunc}... fi consumer_key="<Put your computer key here>" consumer_secret="<Put your consumer secret here>" access_token="<Put your access token here>" access_secret="<Put your access token secret here>" url="https:api.twitter.com/1.1/statuses/update.json" http_post -h Authorization "$(oauth_sign \ $consumer_key $consumer_secret \ $access_token $access_secret \ POST "$url" status="$tweet")" \ "$url" status="$tweet"
- Make sure that you make the file executable. (chmod a+x .git/hooks/post-commit)
- That’s it! If you want to have this automatically added to any new repositories you make, modify the git-core templates. You’ll have to figure out where those are (it’s different for every set up). For me, they’re located here:Â /opt/local/share/git-core/templates/hooks/post-commit.
This is all based heavily on scripts at the following two links:
Good luck!
–David
How and Why I Switched Away From Doit.im
Why
This evening, I migrated away from doit.im. I had been using it for over a year and liked it quite a bit, but increasingly I found myself reverting to a TaskPaper-formatted text file for my daily tasks, which defeated the purpose of having all of my big stuff in Doit.im.
Ultimately, I’m looking for a system that will be able to accomodate little daily lists that I make as well as my grandest long-term plans. Doit.im was really good with the latter, but really just OK for the day-to-day tasks.
Overall, doit.im is pretty well designed. My biggest complaint is that you can’t reorder task lists manually. Why does this matter? Well, one of the biggest questions (if not the biggest question) I am looking to have answered is “What should I do next?” IÂ answer this (in theory, at least) by staying on top of all my lists, by making decisions early and often, and by ordering and reordering every project’s task list over and over throughout the day. The operative principle is that I could then move from project-to-project, effortlessly checking off the next task from each one, before going back to the beginning of the list and starting over. Real life isn’t so perfect, but that’s the concept at least.
Even if three or four tasks could potentially be done to move a project forward, I still need to make a decision about which one to start with. In other words, I’m not interested in what can be done next, I’m interested in what will be done next. The difference between these two things is the difference between my moving forward in a project and just staring bewildered at the 568 tasks in my list.
In summary, manual ordering is essential.
How
Leaving Todo.im was technically much harder than I had expected. I had migrated onto their service using their wonderful API. At the time I had been using Remember The Milk, so I wrote a script that parsed RTM’s RSS feed and inserted the tasks from that one-by-one via Doit.im’s API. Pretty straightforward.
Things were quite a bit harder this time around, though, as Doit.im have disabled their API. To make matters worse, they have no functionality for exporting task lists. This isn’t the sort of feature one notices when deciding to use a task management system, but it probably should be. (I should add, at the risk of sounding paranoid, that it’s hard to see their decision to discontinue their API or any kind of export functionality as anything other than an anti-competitive move.)
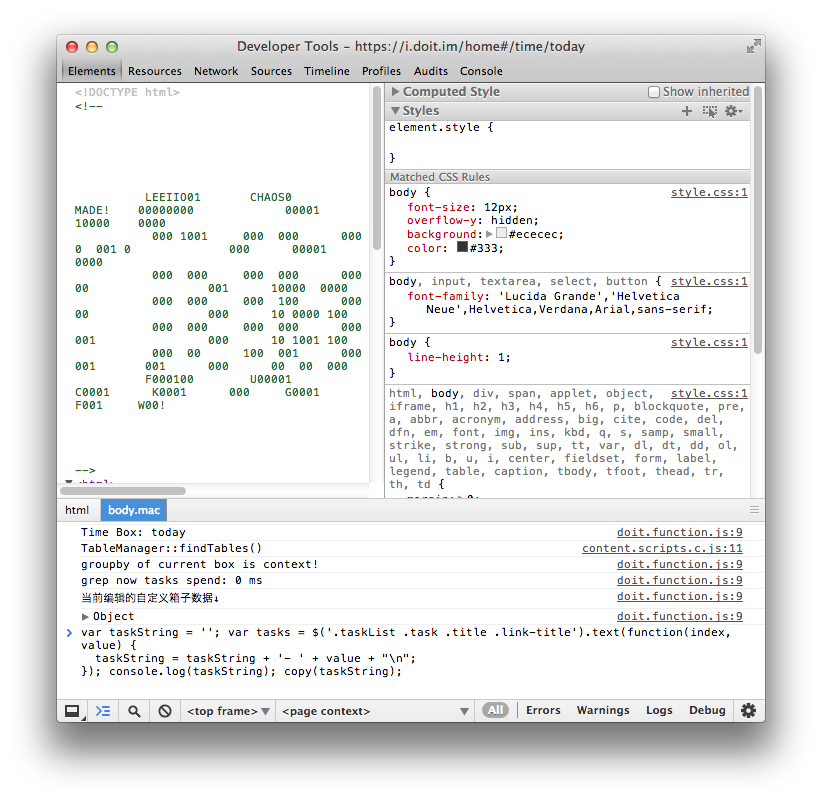
This left their web app. If you go to any of their list views, you can see that all of the tasks are in divs with the class “link-title.” This means it’s fairly easy to scrape this data into a JavaScript variable, and then into a the clipboard buffer. Here goes:
1. In Chrome: open up the Doit.im website
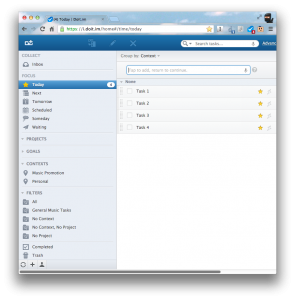
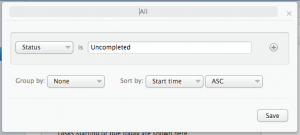
2. (optional)  Make a custom filter that will show you all tasks
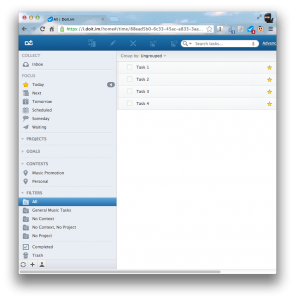
3. Open up a list view for your custom filter (works with any list view really)
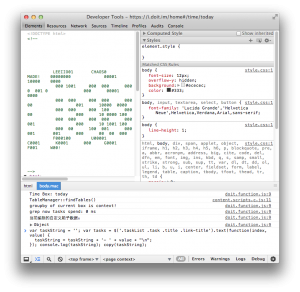
4. Open up the Developer Console (option+command+i on the Mac).
5. Paste this snippet…
var taskString = ''; var tasks = $('.taskList .task .title .link-title').text(function(index, value) { taskString = taskString + '- ' + value + "\n"; }); console.log(taskString); copy(taskString);
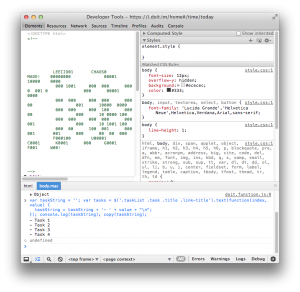
…into the console and hit enter.
6. Go into your favorite text editor and paste.
How To Find (and Delete) Silent Audio Files
The Problem
If you’re anything like me, you have a ton of audio files on your hard drive. When I’m working on music (or an audio synthesis project), I will export out songs that I’m working on in one piece of software in order to import them into another. I keep the intermediary tracks in my Dropbox so that I can use and reuse the little snippets when I’m building my compositions. Life has gotten much easier for me in the past few years as most modern audio sequencers (Cubase, Live, PreSonus Studio One) now offer the possibility of exporting all the component tracks of a composition. The problem is, if you have 12 tracks in your song file and only 4 of them are actually being used in the section of song you are exporting, you’ll end up with 12 audio files—8 of which will be blank. If only there were some easy way of find and deleting those blank files so that they didn’t take up so much of my valuable Dropbox space…
The Solution
Luckily, if you’re using a Mac/Linux box, it’s possible to find (and yes, delete) silent audio files en masse using the command-line. It’s undoubtedly possible in Windows, too, using Cygwin, but I haven’t tried it. NOTE: This is very much a use-at-your-own-risk solution. When I do this, I never delete the files directly. I always just use this system to generate a file list. Then I drop the list of files into Winamp and have a relaxing “silent file listening session.†In other words, I check to make sure they are, in fact, actually silent.
OK, so how does it work?
For starters, you will need to install a super useful tool call SoX. SoX is a command-line tool which can be used to perform conversions from one audio file format to another, to apply filters to your files, as well as to generate useful statistics about your audio. In OS X, you can install it via MacPorts (simply type “sudo port install sox†at the Terminal) and on Linux via apt-get
. You can also go the old-fashioned route by downloading the source files and compiling it.
Once you have it installed, try it out. Open up a Terminal window, cd
into a directory that contains some audio files, and type this:
sox <name_of_audio_file> -n stat
You should get a response that looks like this:
~/loops $ sox <name_of_audio_file> -n stat Samples read: 2596058 Length (seconds): 13.521135 Scaled by: 2147483647.0 Maximum amplitude: 0.848263 Minimum amplitude: -0.943067 Midline amplitude: -0.047402 Mean norm: 0.083552 Mean amplitude: -0.000062 RMS amplitude: 0.120734 Maximum delta: 0.157007 Minimum delta: 0.000000 Mean delta: 0.024596 RMS delta: 0.034412 Rough frequency: 4354 Volume adjustment: 1.060
We can see from the output that this .wav file is definitely not silent. If it were silent, the Max, Min, and Midline amplitudes would all be 0.000000.
OK, now that we’ve seen what SoX provides us with, how do we find the silent files?
Open up your favorite text editor and paste this into a text file:
#!/bin/bash ## A quick hack like script to list all the files that have ## a low amplitude. ## ## Input is a bash file list or glob. ## ## $ find_silent_audio_files *.wav ## ## Each time the script runs it will remove the output list ## and regenerate it. Stderr will output each file and it's ## amplitude. Max=0.0 # Any amplitude greater than this will NOT be listed OutList=~/output.list # The name of the file that contains a # list of file names only of all the # low-amplitude files. # rm $OutList for each in "$@" do amplitude=$(sox "$each" -n stat 2>&1 | grep "Maximum amplitude" | cut -d ":" -f 2 | sed 's/ g') if [[ $(echo "if (${amplitude} > ${Max}) 1 else 0" | bc) -eq 0 ]] then echo "$each --> $amplitude" >&2 echo "$each" >> $OutList fi done
Save this as find_silent_audio_files somewhere in your PATH (maybe in /usr/local/bin or a ~/bin directory if you have one). chmod
it so that it’s executable (chmod +x ./find_silent_audio_files
).
Great. You are now ready to use this tool. Run it as follows:
dave:~ dhilowitz$ cd ~/wave_files dave:wave_files dhilowitz$ find_silent_audio_files *.wav 202_what_you_working_on_chorus 13-Audio.wav --> 0.000000 202_what_you_working_on_chorus 2 - 12 C HEND.wav --> 0.000000 202_what_you_working_on_chorus A-Return.wav --> 0.000000 202_what_you_working_on_chorus B-Return.wav --> 0.000000 202_what_you_working_on_chorus MIDI Tracks.wav --> 0.000000 202_what_you_working_on_chorus MOOG.wav --> 0.000000 202_what_you_working_on_verse 13-Audio.wav --> 0.000000 202_what_you_working_on_verse 2 - 12 C HEND.wav --> 0.000000 202_what_you_working_on_verse A-Return.wav --> 0.000000 202_what_you_working_on_verse B-Return.wav --> 0.000000 202_what_you_working_on_verse MIDI Tracks.wav --> 0.000000 202_what_you_working_on_verse MOOG.wav --> 0.000000
The output of the command will be echo
ed to stdout
as well as to a file in your user directory called ~/output.list
. As you can see from the code listing above, this file name can be changed. Once you know the names of the files, it should be pretty easy to delete them. Obviously, changing “echo†to “rm†in the script above will accomplish this, but, as I said before, I wouldn’t recommend it unless you have backups or really don’t care.
OK. That’s about it. Good luck! I hope this is useful to someone out there.
–David
TIP: Cubase SX 3: Getting TubeBooster to work in Windows 7 64-bit
I spent most of my day yesterday getting my new music recording PC set up (my new PC is a Mac Mini i5 2.3 Ghz running Windows 7 64-bit). After installing Cubase SX 3.1.1 on my PC, and installing all my most essential VST plugins, I discovered that the song that I have been working on most recently wouldn’t load. Cubase itself would start up just fine, but when I tried to load the song itself it would just hang for hours. Whenever this would happen, Process Explorer would show that the CPU was running at about 25%. The only way to get out of these hangs was to kill the process.
I did a lot of research on what might cause this sort of a problem. Â A few other people had had similar issues in the forums, and responding posters had suggested that the problems might be related to one of the plug-ins they had running. I went into C:\Program Files (x86)\VstPlugins and removed all of my plugins, storing them in a folder on my desktop.
I started up Cubase, I loaded my project, and presto, it loaded up almost immediately.
One by one, I added the plugins back in. Each time I did, I would close Cubase, copy the plug-in back to the VstPlugins folder, and relaunch Cubase (ugh). Then I would open the project to see if it loaded.
Finally, when I got to Wurr Audio‘s fantastic TubeBooster plug-in the program began to hang. Uh oh. This plug-in is used *everywhere* in my projects. Like, maybe in every single project I’ve done for the past two or three years. It’s central to my vocal sound. I tried fooling with the settings in Cubase’s *Plug-in Information* window (the ones with names like “Old Host Behavior” and “Lock VST Automation”), but nothing worked.
Finally, after reading about people who had problems with running 32-bit plug-ins on 64-bit hosts, I discovered jBridge. jBridge is a program that allows you to run 32-bit plugins on 64-bit hosts and vice-versa. It does this by “wrapping” the plug-in in another plug-in. Now, bear in mind that while I am running 64-bit operating system, I am running a 32-bit version of Cubase and a 32-bit version of this plug-in. This should not be an issue. And yet…
I downloaded jBridge, wrapped TubeBooster, and it worked! My project loaded like charm. All the settings I had in TubeBooster were preserved as well. Without hesitation I paid the 15 euro fee for the full version jBridge.
Hope this helps somebody out there.
—David
TIP: How to do disk image backups in Ubuntu Linux 10.04
So, I just installed Ubuntu Linux 10.04 on my trusty Toshiba Portege 3480CT8. (Yes, it works beautifully as a lightweight LAMP server.)
One of the first things I set out to do was make a disk image of my new server, so that if something goes awry, I can restore things later on.
Here’s what I did:
First, I plugged my external drive into the USB port. This got assigned to /dev/sdb. Â I mounted the drive.
$ sudo mkdir /media/backup_04 $ sudo mount /dev/sdb1 /media/backup_04 -t ntfs $ sudo mkdir /media/backup_04/portege-linux-backups
Next, Â I installed dcfldd. This is just like dd, which comes with most Linux distributions, except that it can output time remaining (among other things).
$ apt-get install dcfldd
Finally, IÂ started the backup:
$ dcfldd if=/dev/sda of=/media/backup_04/portege-linux-backups/2011_11_28.img sizeprobe=if
This produces an output that looks like this:
$ [16% of 28615Mb] 155136 blocks (4848Mb) written. 01:17:37 remaining.
–David
TIP: Installing Ruby on Rails on Mac OS X 10.6.8
1. Install XCODE 4. This is actually trickier than it seems. You have to:
a) download XCode;
b) run the .dmg.
c) quit iTunes, then go into Activity Monitor and force quit on anything iTunes related (iTunesHelper as well);
d) go into the Applications folder and find the “Install XCode†app, and run that. (Yes, you have to run a second Install XCode app…and I had to run it twice. It failed the first time. If you want to watch it fail, drop into Terminal and type this: tail -f /var/log/install.log.
2. Install MacPorts.
3. Test MacPorts by installing joe. Type:
$ sudo bash $ port install joe.
Enter your password.
4. A bunch of things will be preinstalled with the wrong architecture. We’re trying to get ruby as an x86_64 architecture. So…uninstall libiconv and zlib (you may have to tinker with this a bit because it will ask you which version you want to uninstall — the answer is “all of themâ€)
$ sudo port uninstall -f libiconv @1.13.1_0 $ sudo port uninstall -f libiconv @1.14_0 $ sudo port uninstall -f zlib $ port uninstall -f readline $ port uninstall -f openssl $ port uninstall -f ncurses @5.8_1 $ port uninstall -f ncurses @5.9_0 $ port uninstall -f ncurses @5.9_1 $ port uninstall -f gdbm
5. Install ruby by doing:
$ port install ruby
7. Update your gems:
$ gem update --system
8. And, finally, install Rails:
$ gem install rails --pre
Useful links: