TIP: Turn WordPress Page Titles On or Off Using Custom Fields

Posted on April 25, 2013 by David Hilowitz

Most WordPress themes display page titles for every page. This is usually what one wants, but sometimes it’s useful to be able to easily turn off WordPress page titles for individual pages but still keep them on by default. This is easy to do with custom fields. For simplicity’s sake, I am going to base these examples on the default WordPress Twenty Twelve theme although the same principle should apply to almost any theme.

The first step is to find where the page title is being generated. In the Twenty Twelve theme, this is in the content-page.php file. Go into content-page.php and find the block of code that looks like this:

<header class="entry-header">
<h1 class="entry-title"><?php the_title(); ?></h1>
</header>

and change it to this:

<?php if (get_post_meta($post->ID, 'show_title', true) != "no") {?>
<header>
<h1><?php the_title(); ?></h1>
</header>
<?}?>

As you can see we’ve wrapped the <header> tag in an “if” statement. This checks for the presence of a “show_title” custom field for this particular page. If one is present and its value also equals “no,” we don’t show the title. Otherwise, the page title is shown.

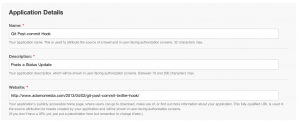
The only step left is to open up the editor for the page you want to modify. Go to the bottom of the page to the “Custom Fields” section. (If there is no “Custom Fields” section, you may have to go up to the top, click “Screen Options” and check the “Custom Fields” box.) In the “Name” box, type “show_title.” In the “Value” box, type “no.” Hit “Update.”

That’s it! Your page title should be gone from that page.

–Dave Hilowitz

How to Relay your Git Commit Messages to Twitter in 16 Easy Steps

Posted on April 2, 2013 by David Hilowitz

A while back I started using Twitter as a micro-journaling platform. I created a private Twitter account, and every few hours as I worked on code, I would jot down a private tweet to myself about what it was that I was doing. This private Twitter stream was then archived using Momento App for iPhone. After a while, it occurred to me that another stream that I would love to have archived in Momento is my Git commits as it often says more about what I’m up to than it would occur to me to write in a journal.

I set up a Git post-commit hook that posts to my private Twitter account each time I make a local commit on my development repository. Here’s what I did:

  1. Prerequisite: Create a Twitter account. It doesn’t have to be private, but it can be.
  2. Register an application with Twitter. Here’s how you do that:
    1. Go to http://dev.twitter.com. You may need to sign in again.Screen Shot 2013-04-02 at 5.12.18 PM
    2. Hover over your avatar in the top-right, and choose “My Applications” from the menu that appears.Screen Shot 2013-04-02 at 5.22.26 PM
    3. Click on the “Create New Application” Button.Screen Shot 2013-04-02 at 5.23.14 PM
    4. Fill out the next however you’d like. The website address can be anything. The name of the app can be anything. Leave Callback URL blank. Agree to the agreement, enter the CAPTCHA and you’re good to go.Screen Shot 2013-04-02 at 5.36.56 PM
    5. Next, you’ll be taken to a screen with a bunch of keys. Copy all of those down into a text editor.
    6. Click the “Settings” tab. Change to “Read and Write” for Application Type. Click Update.Screen Shot 2013-04-02 at 5.36.42 PM
    7. Go back to the Details tab. Scroll down to the bottom and click “Create my OAuth Access Token.”
    8. Wait a few seconds, refresh the page, wait some more. Eventually, at the bottom of the page a section should appear that says “Your access token.” Copy these codes down.
    9. That’s it for your Twitter App setup.
  3. Open up a shell on the machine you are planning to be commit to (and tweet from).
  4. Install http_post. You will have to compile this from source. (make and make install). Make sure it’s accessible from your PATH.
  5. Install oauth_sign. You will also have to compile this form source. (make and make install) Make sure it’s accessible from your PATH.
  6. Finally, save the following script into .git/hooks/post-commit in your Git repository.
    #!/bin/sh
    
    # PATH modification needed for http_post and oauth_sign
    export PATH=$PATH:/usr/local/bin
    
    toplevel_path=`git rev-parse --show-toplevel`
    toplevel_dir=`basename "$toplevel_path"`
    
    branch=`git rev-parse --abbrev-ref HEAD`
    subject=`git log --pretty=format:%s -n1`
    hashtags="#code #$toplevel_dir"
    tweet=$hashtags' ['$branch']: "'$subject'"'
    
    # truncate tweets that are longer than 140 characters
    if [ ${#tweet} -gt 140 ]
        then
            tweet_trunc=$(echo $tweet | cut -c1-137)
            tweet=${tweet_trunc}...
    fi
    
    consumer_key="<Put your computer key here>"
    consumer_secret="<Put your consumer secret here>"
    access_token="<Put your access token here>"
    access_secret="<Put your access token secret here>"
    url="https:api.twitter.com/1.1/statuses/update.json"
    
    http_post -h Authorization "$(oauth_sign \
    $consumer_key $consumer_secret \
    $access_token $access_secret \
    POST "$url" status="$tweet")" \
         "$url" status="$tweet"
  7. Make sure that you make the file executable. (chmod a+x .git/hooks/post-commit)
  8. That’s it! If you want to have this automatically added to any new repositories you make, modify the git-core templates. You’ll have to figure out where those are (it’s different for every set up). For me, they’re located here: /opt/local/share/git-core/templates/hooks/post-commit.

This is all based heavily on scripts at the following two links:

Good luck!

–David